![Logo-2.svg]](https://support.pointapp.org/hubfs/Logo-2.svg)
BEFORE YOU START: ONE-TIME SETUP
Step 1: Make sure you have created a Checkr account and connected it to your POINT account. How do I connect Checker and POINT to start background check screenings?
Step 2: If you're planning on requiring background checks for most of your volunteer opportunities, save admin time by setting a default background check package for your organization. When a default is set, it will automatically populate when you require a background check on an event, and you can still change it for a specific event if needed. How do I set a default background check package for our organization?
Step 3: Set an auto-expiration for your organization's background checks, if applicable. Each nonprofit has its own decision-making process for background check reviews: your organization decides what it means to "pass" a background check and how long that background check is valid. How do I set an expiration length for background checks?
HOW TO REQUIRE A BACKGROUND CHECK ON AN EVENT
-
Select "Opportunities" in the left-hand admin menu, then select "Manage Events" from the submenu.
-
On the Manage Events page, select "Create Event" in the upper right-hand corner of the screen (or open an existing event to edit it).
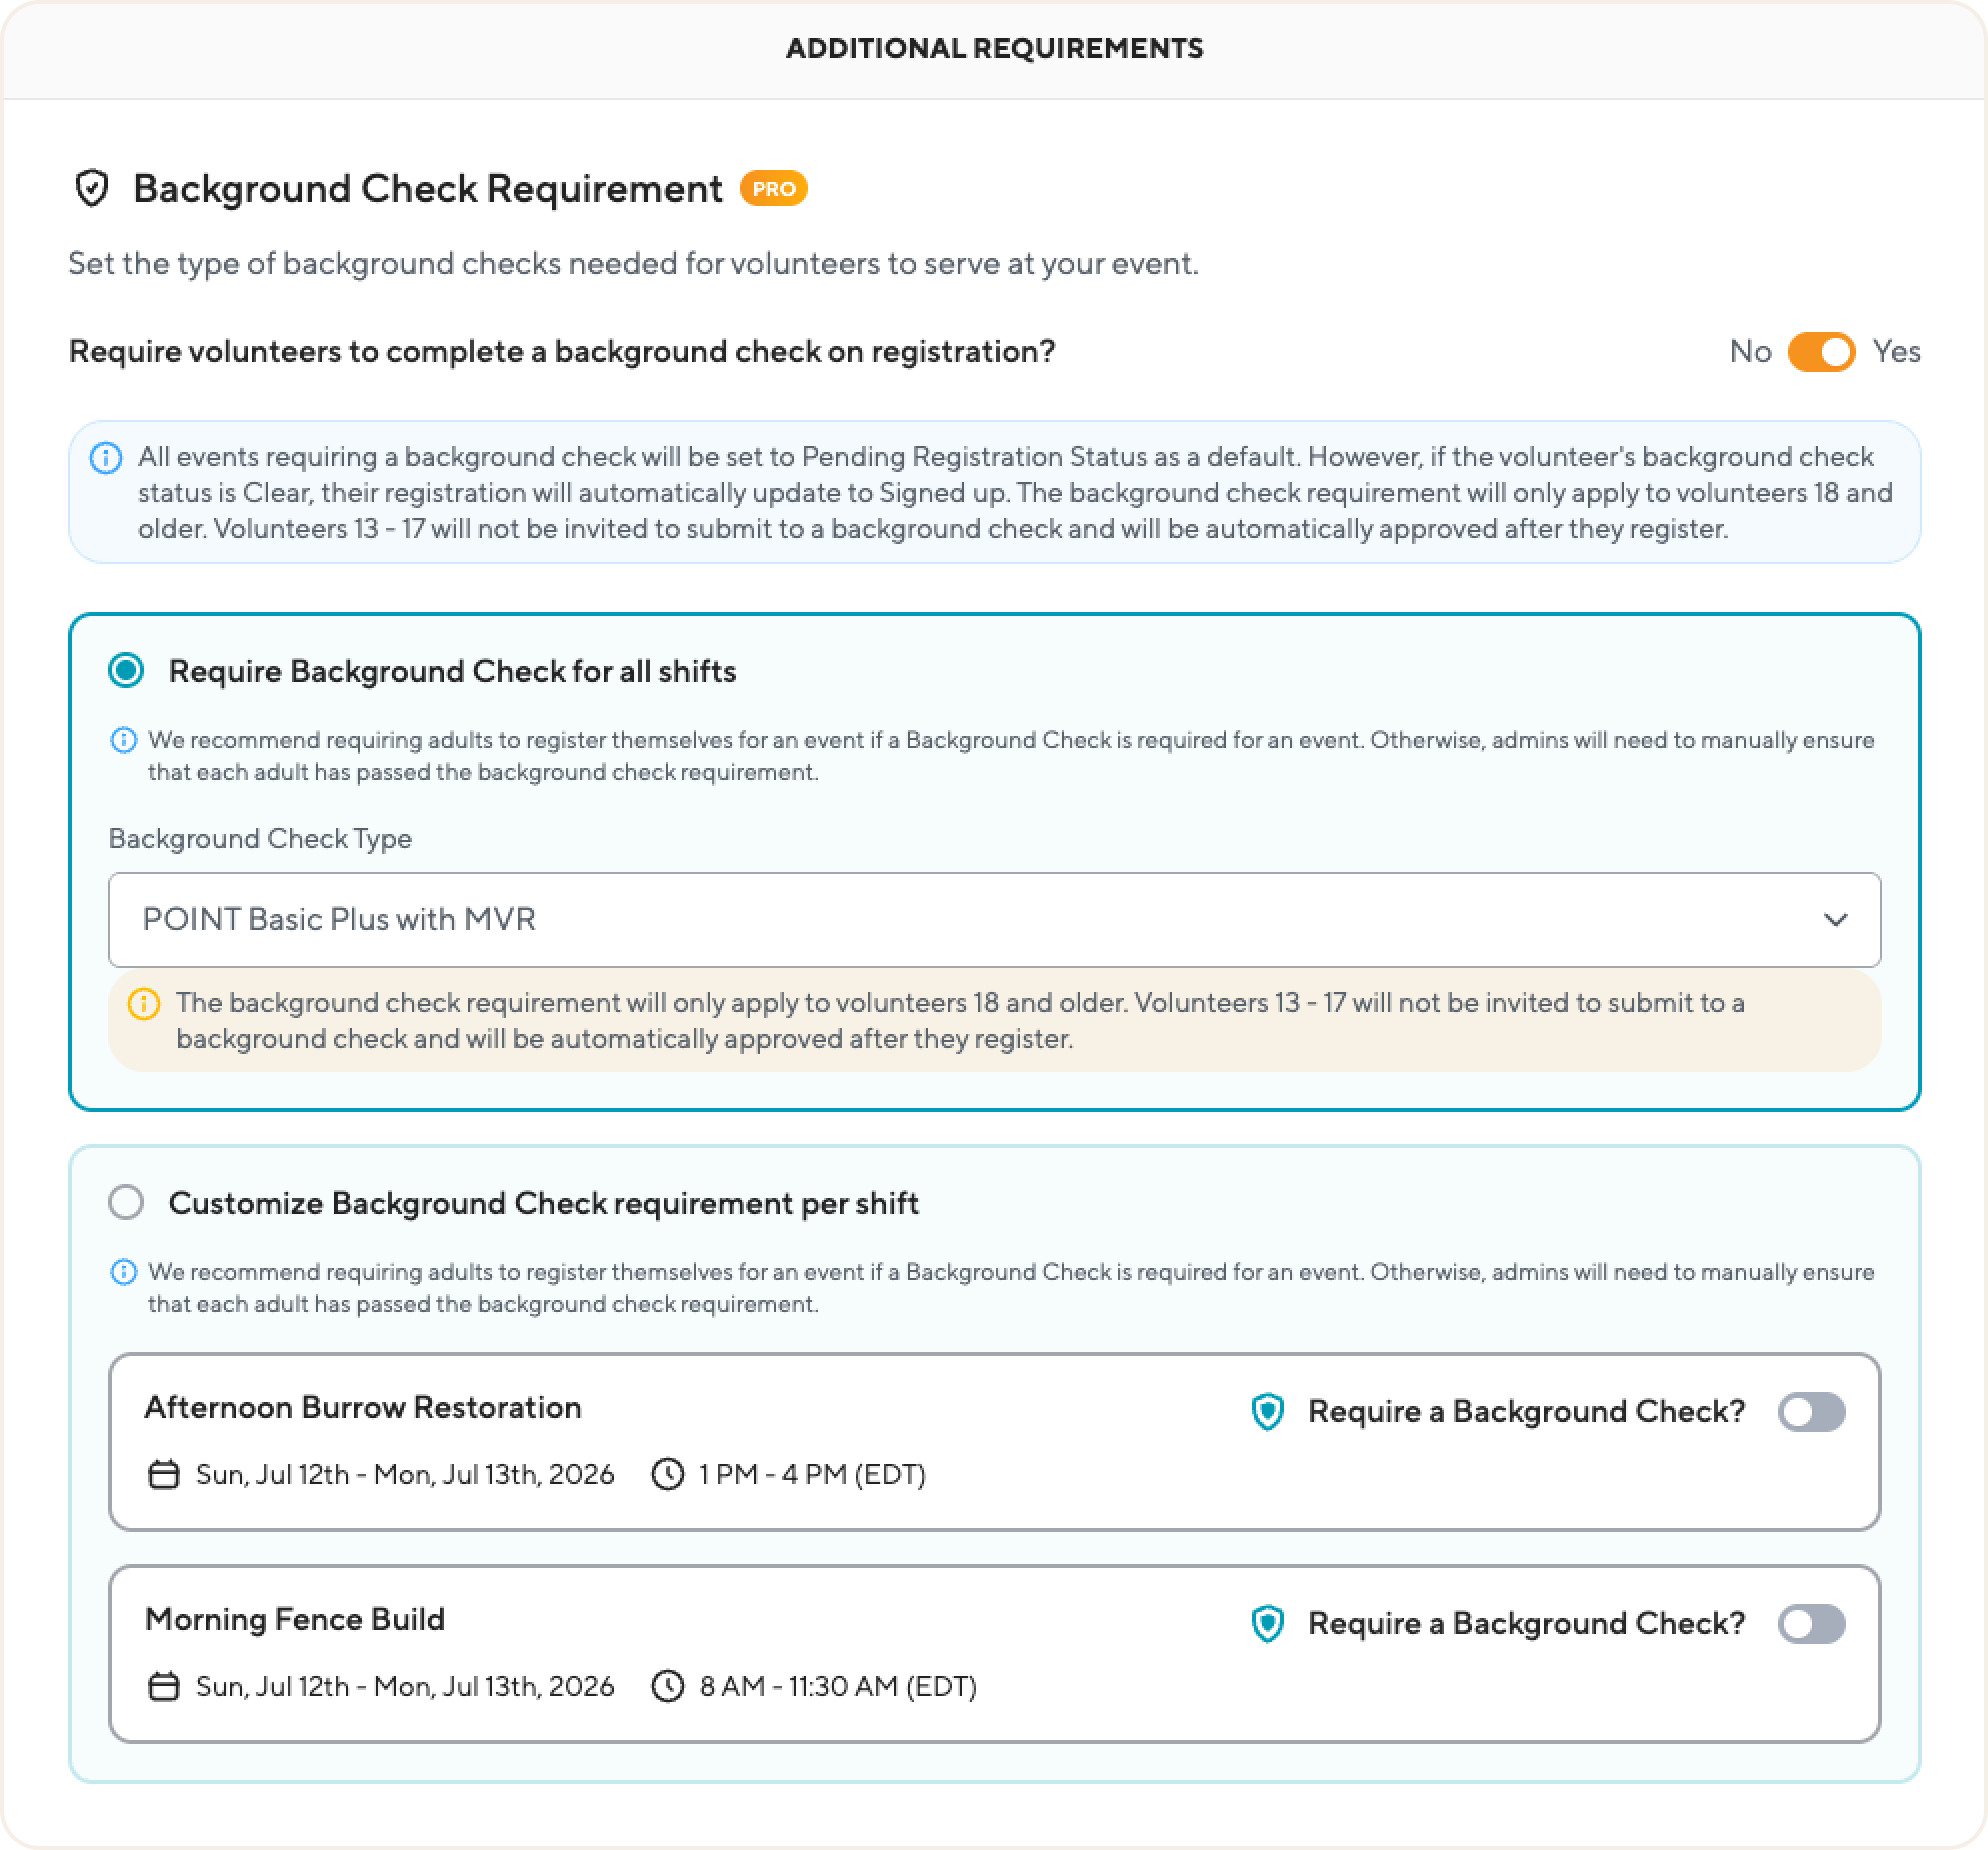
- Go to the Volunteer Requirements step and, under Additional Requirements, locate Background Check Requirement.
-
Next to "Require volunteers to complete a background check on registration?", switch the toggle from "No" to "Yes".
-
Once the toggle is on, choose how the requirement applies to your event. There are two options:
-
Option A: Require Background Check for all shifts.
Select this option to apply one background check requirement to every shift in the event. Then, in the "Background Check Type" dropdown, select the background check package you want to require (for example, POINT Basic Plus with MVR). If your organization has a default package set, it will automatically populate here, and you can change the selection for this event if needed. -
Option B: Customize Background Check requirement per shift.
Select this option if you want to require background checks on some shifts but not others. Each shift in the event is listed with its own "Require a Background Check?" toggle, so you can turn the requirement on or off shift by shift and select the package for each shift that requires one. This gives you the most flexibility, for example when only some shifts involve working with vulnerable populations.
-
-
Complete the remaining event setup steps and publish your event.
Tip: If you wish to block event registration a few days before an event starts, so that there is time for all of the background checks to be completed, follow the steps to set a deadline to register.
HOW REGISTRATION STATUSES WORK WITH BACKGROUND CHECKS
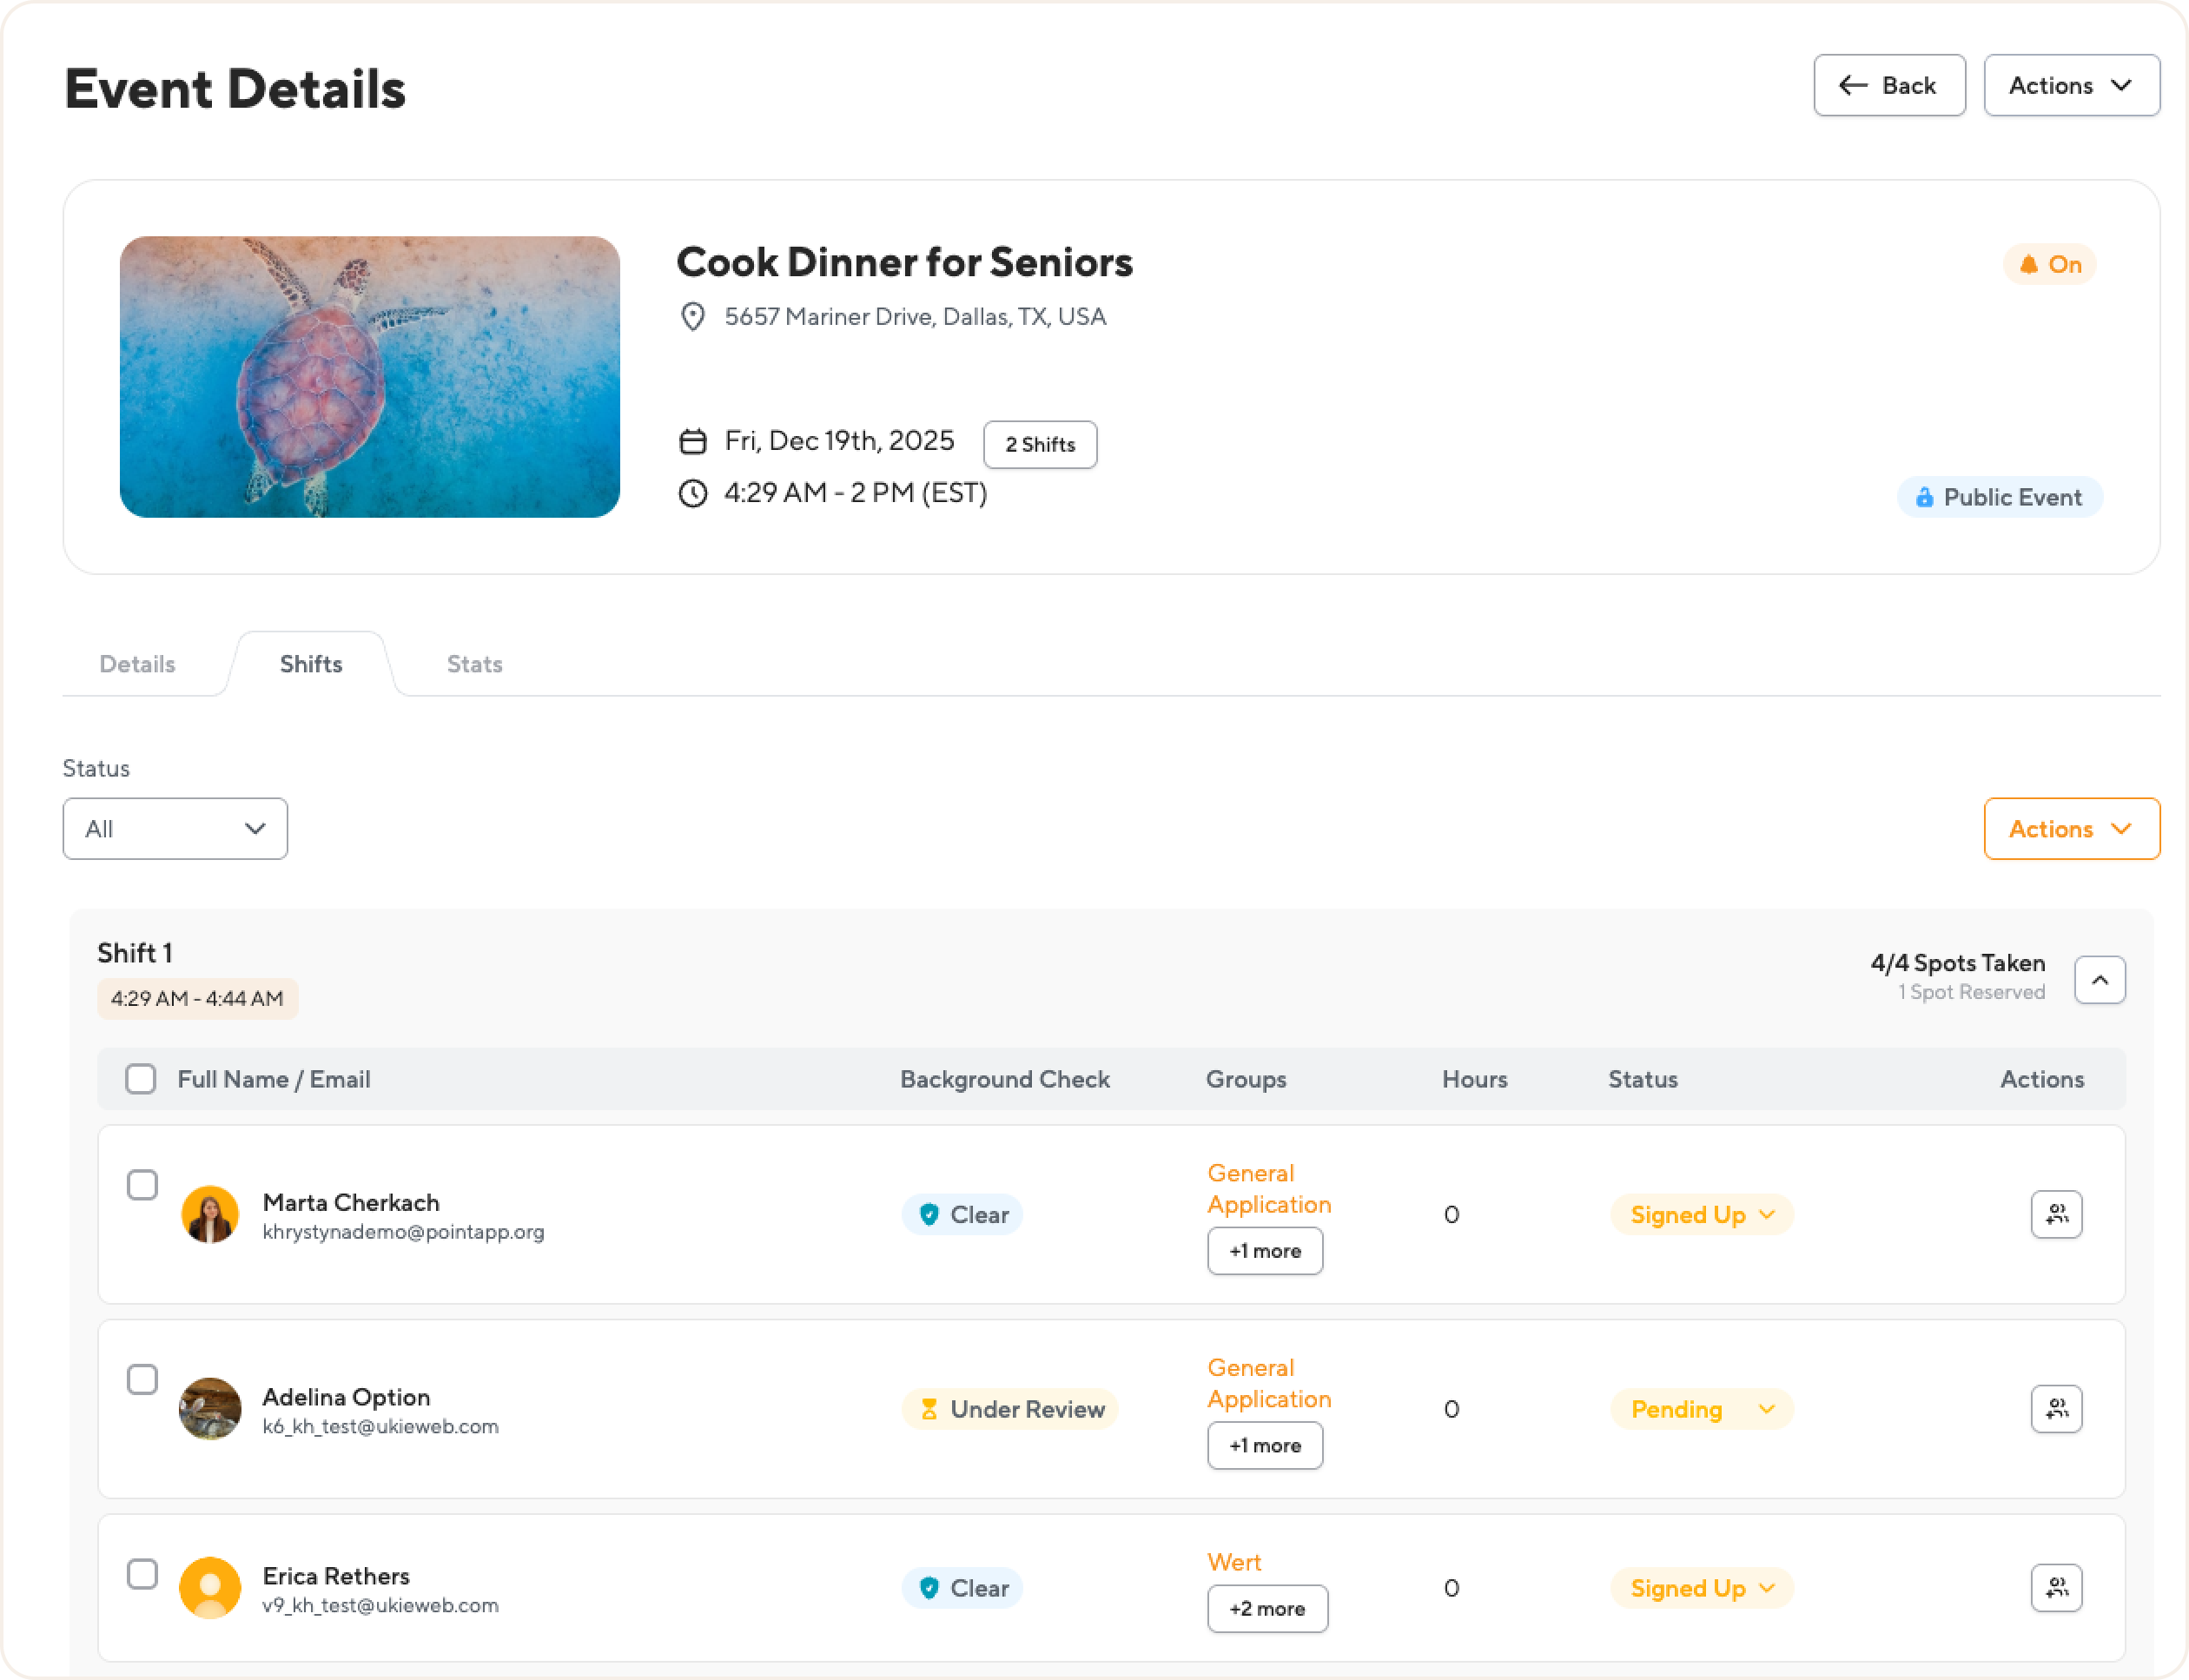
All events requiring a background check are set to Pending registration status by default. This means volunteers who sign up are placed in "Pending" until their background check requirement is resolved.
When a volunteer's background check status becomes Clear, POINT automatically changes their registration from Pending to Signed up for events where the event's default registration status is "Signed Up". If the event's default registration status is "Pending", the registration status is not changed automatically, and the admin approves the volunteer manually.
For all other cases, once the background check is completed, the admin must review the report and manually approve the volunteer by changing their registration from "Pending" to "Signed Up" in the Event Details Volunteer List. How do I approve a volunteer for an event after a background check?
AGE REQUIREMENTS FOR BACKGROUND CHECKS
The background check requirement only applies to volunteers 18 and older. Volunteers aged 13 to 17 will not be invited to submit a background check and will be automatically approved after they register.
IMPORTANT: WHO TRIGGERS THE BACKGROUND CHECK REQUEST
Background check requests are automatically sent when the volunteer registers themselves for the event. If an admin manually assigns a volunteer to an event that requires a background check, the system will NOT automatically send the request, and the admin must request the background check manually from the volunteer's contact profile.
For this reason, we recommend requiring adults to register themselves for an event when a background check is required. Otherwise, admins will need to manually ensure that each adult has passed the background check requirement. How Background Check Triggers Work (Automatic vs. Manual)
WHERE BACKGROUND CHECK REPORTS ARE STORED
Volunteers' background check reports are not stored in POINT: they are only stored in Checkr. POINT stores only the status of the screening.
If you'd like to view a volunteer candidate's background check you can go directly to your Checkr account and search for the volunteer by name. Or you can find the quick links to a volunteer's Checkr profile and report in POINT.
Note: To understand the background check process for volunteers, read this article.
Background Check Status Types: