Why invite your volunteers to POINT?
When you invite your volunteers to POINT, they are sent a link to create a POINT volunteer user account. A volunteer user account is required for volunteers to sign themselves up for your events on POINT.
The system will create a contact record with the status "Invite Sent" and a private access level for your internal organization's contact list. As an admin, you can do anything with the contact: edit the contact record, add it to a group or program, or assign it to an event. You can also just create a contact record with the status "Unclaimed" and send an email invitation later.
Before you get started
To invite a volunteer to join your organization, you will need: their name and email.
Three options
There are three ways to create contacts and invite them via email to join your organization on POINT:
- You can manually type in one name and email address
- You can manually type in their multiple names and email addresses
- You can upload a CSV file containing multiple names and email addresses
How to manually create one contact and invite it to join your organization on POINT (see image below):
- Click on the “Create contact” button on the Contacts page.
- Click on “Add New Contact.
- Enter the contact's First Name, Last Name, and Email. Other contact information is optional.
.png?width=269&height=222&name=Add%20New%20Contact@2x%20(1).png)
.png?width=688&height=1254&name=Frame%2065%20(2).png)
4. Choose an option: "Create contacts and invite them via email to claim their POINT account".
5. Click “Add Contact and Invite”.
Invitation sent example:

How to quickly add multiple contacts and invite them to join your organization on POINT (see image below):
- Click on the “Create contact” button on the Contacts page.
- Click on “Quick Add Multiple Contacts”
- Enter their First Name, Last Name, Email Address
Additional options before invitation (Optionally):
- To manually add more contacts click "Add Another" and a new field for inviting a volunteer will appear. (If you added too many fields, just delete it.)
- Associate contacts with Groups. Optionally select one or more groups to add the contacts to automatically.
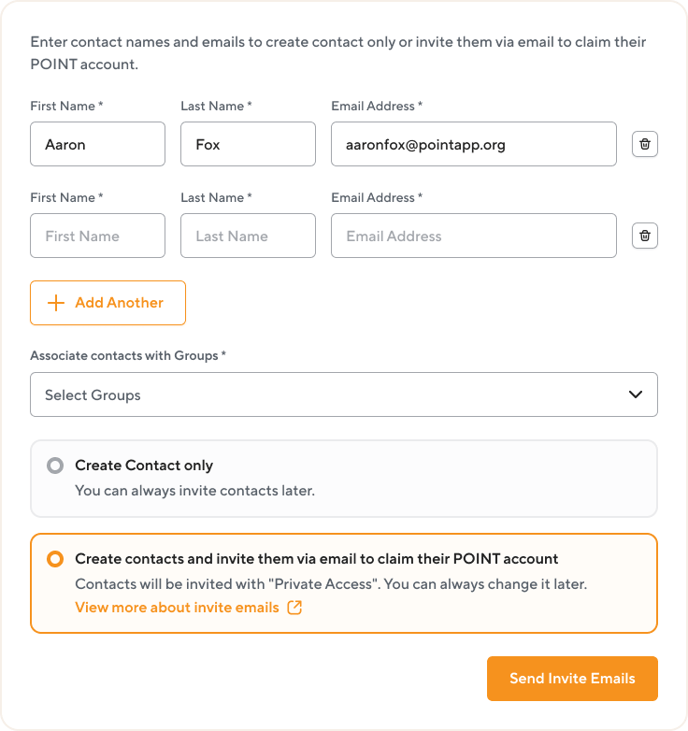
4.Choose an option: "Create contacts and invite them via email to claim their POINT account".
5. Click “Send Invite Emails”.
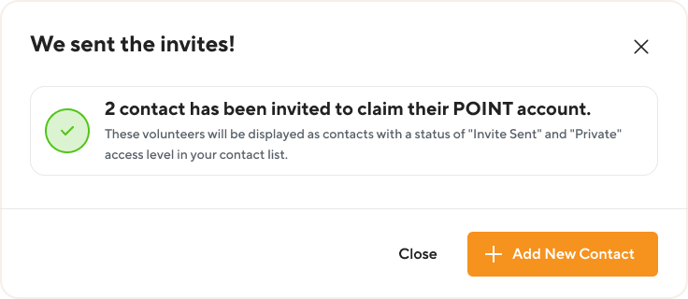
Invite sent example:
How to Import Contacts CSV file of volunteers to join your organization on POINT (see image below):
- Download the CSV template
- Add your volunteers to the CSV template.
- The first row must contain the headers. Please don’t edit this row.
- Your data should begin in row 2.
- Please delete the example row provided in the template and add your own data.
- Note: the “group” column is optional.
- If you want to add volunteers to a group, the group name must match exactly what is already in POINT. It is case-sensitive.
- If you want to add volunteers to a group, the group name must match exactly what is already in POINT. It is case-sensitive.
4. Click on “Import a CSV”
5. Click the “Upload a CSV file” button
6. Select the file you just created that contains your volunteer data.
.png?width=688&height=578&name=Frame%2065%20(1).png)
7. Optionally select one or more groups to add the volunteers to automatically.
8. Click “Sent Invite Emails”.
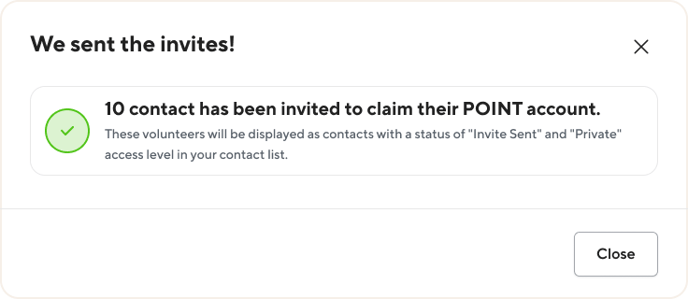
Invites sent example:
Note: Do you have issues inviting volunteers? You can check for errors here .
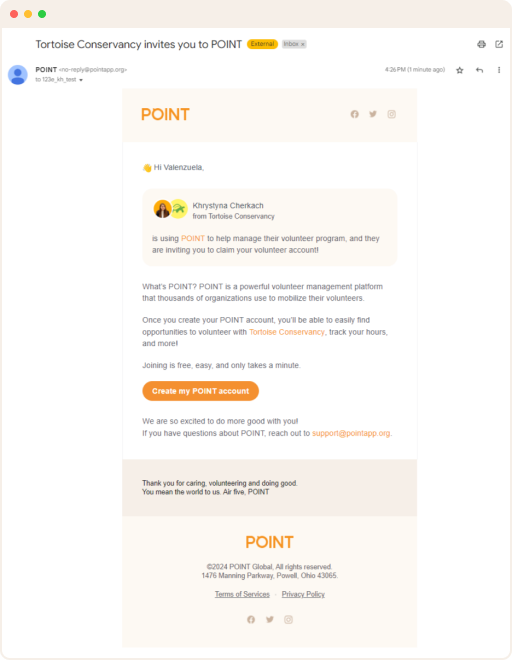
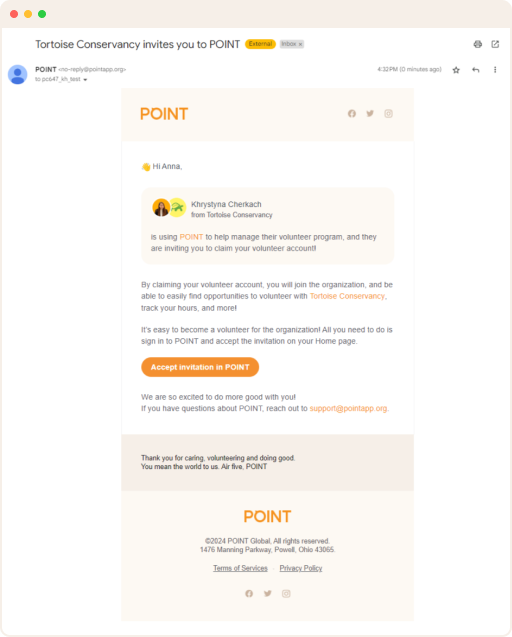
What does the email look like that my volunteers receive?
POINT will automatically send your volunteer(s) and email that looks something like this:
- For users who don't have created a POINT account
- For users who have created a POINT account
Where can I find the contacts I invited to join us on POINT?
Admins can see which contacts have been invited in their dashboard:
- Go to Contacts page
- Filter by Join Status "Invite Sent" or use Sort by: Date Added (Newest First)
Note: Contact records with a join status of "Invite Sent" indicate that an invitation has been sent to this email address, but the user has not yet accepted your invitation to join your organization.
Questions? Email us at support@pointapp.org.