How to add documents (see video below):
- In the left menu, click "Organization," then select "Documents." This will take you to your Document Library.
- Start by giving your document a name. The name will be visible to volunteers, while the description is for internal use only and can be seen by admins in your organization. Then, either drag and drop your file into the grey box or click "Browse Document" to select a file from your computer.
- Finally, click the orange "+ Add Document" button on the right to complete the upload.
How to Add documents :
How to edit documents (see video below):
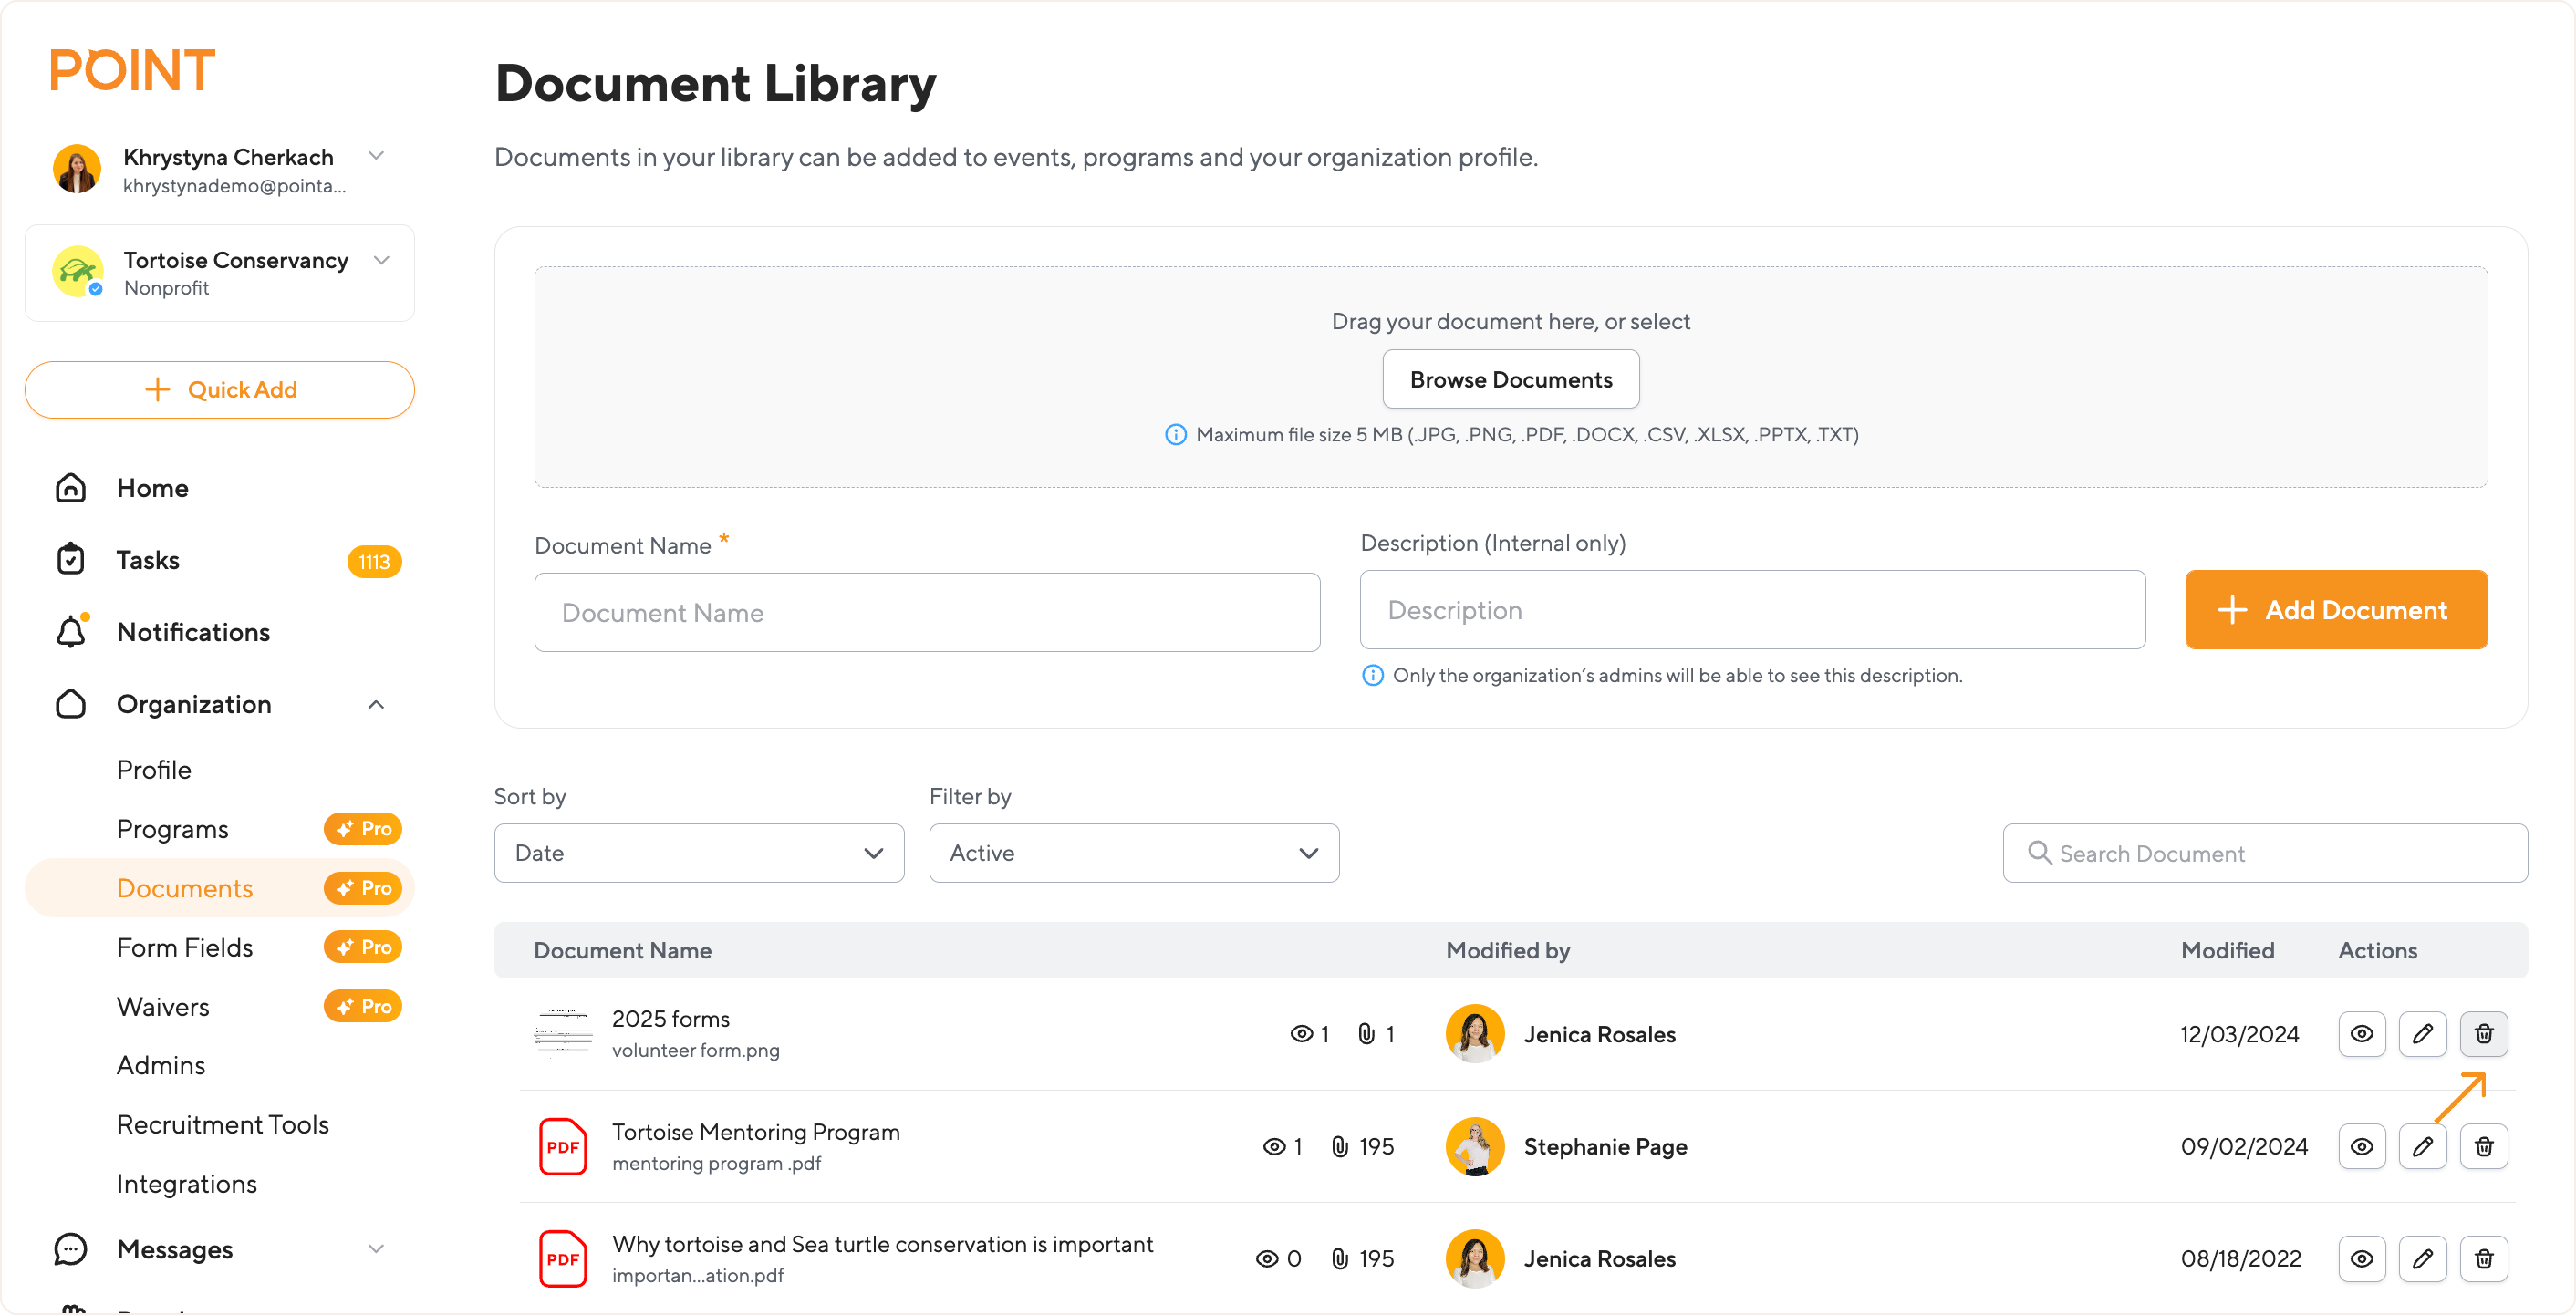
- In the left menu, click "Organization," then select "Documents." This will take you to your Document Library.
- Find the document you want to edit in your list (scroll down past where you add a document), then click the pencil button under the “Actions” column.
- This will take you to the document's details where you can change the document name, the description, and the ability to remove the document. Don’t forget to click “Update” once you finish making edits.
How to edit documents:
How to delete a document (see video below):
- In the left menu, click "Organization," then select "Documents." This will take you to your Document Library.
- Find the document you want to remove from your list (scroll down past where you add a document), then click the trash can button under the “Actions” column.
- Confirm your actions by clicking “Remove document”.
How to delete a document:
Questions? Email us at support@pointapp.org.